MCPProxy is an open-source desktop application that super-charges AI agents with intelligent tool discovery, massive token savings, and built-in security quarantine against malicious MCP servers.


System Tray - Upstream Servers System Tray - Quarantine Management
- Scale beyond API limits – Federate hundreds of MCP servers while bypassing Cursor's 40-tool limit and OpenAI's 128-function cap.
- Save tokens & accelerate responses – Agents load just one
retrieve_toolsfunction instead of hundreds of schemas. Research shows ~99 % token reduction with 43 % accuracy improvement. - Advanced security protection – Automatic quarantine blocks Tool Poisoning Attacks until you manually approve new servers.
- Works offline & cross-platform – Native binaries for macOS (Intel & Apple Silicon), Windows (x64 & ARM64), and Linux (x64 & ARM64) with system-tray UI.
macOS (Recommended - DMG Installer):
Download the latest DMG installer for your architecture:
- Apple Silicon (M1/M2): Download DMG →
mcpproxy-*-darwin-arm64.dmg - Intel Mac: Download DMG →
mcpproxy-*-darwin-amd64.dmg
Alternative install methods:
macOS (Homebrew):
brew install smart-mcp-proxy/mcpproxy/mcpproxyManual download (all platforms):
Prerelease Builds (Latest Features):
Want to try the newest features? Download prerelease builds from the next branch:
- Go to GitHub Actions
- Click the latest successful "Prerelease" workflow run
- Download from Artifacts:
dmg-darwin-arm64(Apple Silicon Macs)dmg-darwin-amd64(Intel Macs)versioned-linux-amd64,versioned-windows-amd64(other platforms)
Note: Prerelease builds are signed and notarized for macOS but contain cutting-edge features that may be unstable.
- macOS: Intel | Apple Silicon
Anywhere with Go 1.22+:
go install github.com/smart-mcp-proxy/mcpproxy-go/cmd/mcpproxy@latestmcpproxy serve # starts HTTP server on :8080 and shows trayEdit mcp_config.json (see below). Or ask LLM to add servers (see doc).
📖 Complete Setup Guide - Detailed instructions for Cursor, VS Code, Claude Desktop, and Goose
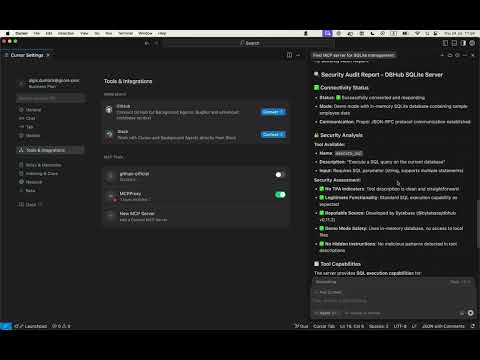
- Open Cursor Settings
- Click "Tools & Integrations"
- Add MCP server
    "MCPProxy": {
      "type": "http",
      "url": "http://localhost:8080/mcp/"
}| Field | Description | Default |
|---|---|---|
listen |
Address the proxy listens on | 127.0.0.1:8080 |
data_dir |
Folder for config, DB & logs | ~/.mcpproxy |
enable_tray |
Show native system-tray UI | true |
top_k |
Tools returned by retrieve_tools |
5 |
tools_limit |
Max tools returned to client | 15 |
tool_response_limit |
Auto-truncate responses above N chars (0 disables) |
20000 |
tls.enabled |
Enable HTTPS with local CA certificates | false |
tls.require_client_cert |
Enable mutual TLS (mTLS) for client authentication | false |
tls.certs_dir |
Custom directory for TLS certificates | {data_dir}/certs |
tls.hsts |
Send HTTP Strict Transport Security headers | true |
docker_isolation |
Docker security isolation settings (see below) | enabled: false |
Main Commands:
mcpproxy serve # Start proxy server with system tray
mcpproxy tools list --server=NAME # Debug tool discovery for specific server
mcpproxy trust-cert # Install CA certificate as trusted (for HTTPS)Serve Command Flags:
mcpproxy serve --help
-c, --config <file> path to mcp_config.json
-l, --listen <addr> listen address for HTTP mode
-d, --data-dir <dir> custom data directory
--log-level <level> trace|debug|info|warn|error
--log-to-file enable logging to file in standard OS location
--read-only enable read-only mode
--disable-management disable management features
--allow-server-add allow adding new servers (default true)
--allow-server-remove allow removing existing servers (default true)
--enable-prompts enable prompts for user input (default true)
--tool-response-limit <num> tool response limit in characters (0 = disabled)
Tools Command Flags:
mcpproxy tools list --help
-s, --server <name> upstream server name (required)
-l, --log-level <level> trace|debug|info|warn|error (default: info)
-t, --timeout <duration> connection timeout (default: 30s)
-o, --output <format> output format: table|json|yaml (default: table)
-c, --config <file> path to mcp_config.json
Debug Examples:
# List tools with trace logging to see all JSON-RPC frames
mcpproxy tools list --server=github-server --log-level=trace
# List tools with custom timeout for slow servers
mcpproxy tools list --server=slow-server --timeout=60s
# Output tools in JSON format for scripting
mcpproxy tools list --server=weather-api --output=jsonMCPProxy provides secure secrets management using your operating system's native keyring to store sensitive information like API keys, tokens, and credentials.
- OS-native security: Uses macOS Keychain, Linux Secret Service, or Windows Credential Manager
- Placeholder expansion: Automatically resolves
${keyring:secret_name}placeholders in config files - Global access: Secrets are shared across all MCPProxy configurations and data directories
- CLI management: Full command-line interface for storing, retrieving, and managing secrets
Store a secret:
# Interactive prompt (recommended for sensitive values)
mcpproxy secrets set github_token
# From command line (less secure - visible in shell history)
mcpproxy secrets set github_token "ghp_abcd1234..."
# From environment variable
mcpproxy secrets set github_token --from-env GITHUB_TOKENList all secrets:
mcpproxy secrets list
# Output: Found 3 secrets in keyring:
# github_token
# openai_api_key
# database_passwordRetrieve a secret:
mcpproxy secrets get github_tokenDelete a secret:
mcpproxy secrets delete github_tokenUse ${keyring:secret_name} placeholders in your mcp_config.json:
{
"mcpServers": [
{
"name": "github-mcp",
"command": "uvx",
"args": ["mcp-server-github"],
"protocol": "stdio",
"env": {
"GITHUB_TOKEN": "${keyring:github_token}",
"OPENAI_API_KEY": "${keyring:openai_api_key}"
},
"enabled": true
},
{
"name": "database-server",
"command": "python",
"args": ["-m", "my_db_server", "--password", "${keyring:database_password}"],
"protocol": "stdio",
"enabled": true
}
]
}Placeholder expansion works in:
- ✅ Environment variables (
envfield) - ✅ Command arguments (
argsfield) - ❌ Server names, commands, URLs (static fields)
Storage Location:
- macOS: Keychain Access (
/Applications/Utilities/Keychain Access.app) - Linux: Secret Service (GNOME Keyring, KDE Wallet, etc.)
- Windows: Windows Credential Manager
Service Name: All secrets are stored under the service name "mcpproxy"
Global Scope:
- ✅ Secrets are shared across all MCPProxy instances regardless of:
- Configuration file location (
--configflag) - Data directory (
--data-dirflag) - Working directory
- Configuration file location (
- ✅ Same secrets work across different projects and setups
⚠️ No isolation - all MCPProxy instances access the same keyring
If you use MCPProxy with multiple projects or environments, use descriptive secret names:
# Environment-specific secrets
mcpproxy secrets set prod_database_url
mcpproxy secrets set dev_database_url
mcpproxy secrets set staging_api_key
# Project-specific secrets
mcpproxy secrets set work_github_token
mcpproxy secrets set personal_github_token
mcpproxy secrets set client_a_api_keyThen reference them in your configs:
{
"mcpServers": [
{
"name": "work-github",
"env": {
"GITHUB_TOKEN": "${keyring:work_github_token}"
}
},
{
"name": "personal-github",
"env": {
"GITHUB_TOKEN": "${keyring:personal_github_token}"
}
}
]
}- Encrypted storage: Secrets are encrypted by the OS keyring
- Process isolation: Other applications cannot access MCPProxy secrets without appropriate permissions
- No file storage: Secrets are never written to config files or logs
- Audit trail: OS keyring may provide access logs (varies by platform)
Secret not found:
# Verify secret exists
mcpproxy secrets list
# Check the exact secret name (case-sensitive)
mcpproxy secrets get your_secret_nameKeyring access denied:
- macOS: Grant MCPProxy access in
System Preferences > Security & Privacy > Privacy > Accessibility - Linux: Ensure your desktop session has an active keyring service
- Windows: Run MCPProxy with appropriate user permissions
Placeholder not resolving:
# Test secret resolution
mcpproxy secrets get your_secret_name
# Check logs for secret resolution errors
mcpproxy serve --log-level=debugMCPProxy provides Docker isolation for stdio MCP servers to enhance security by running each server in its own isolated container:
- Process Isolation: Each MCP server runs in a separate Docker container
- File System Isolation: Servers cannot access host file system outside their container
- Network Isolation: Configurable network modes for additional security
- Resource Limits: Memory and CPU limits prevent resource exhaustion
- Automatic Runtime Detection: Detects Python, Node.js, Go, Rust environments automatically
- Runtime Detection: Automatically detects server type (uvx→Python, npx→Node.js, etc.)
- Container Selection: Maps to appropriate Docker images with required tools
- Environment Passing: Passes API keys and config via secure environment variables
- Git Support: Uses full Docker images with Git for package installations from repositories
Add to your mcp_config.json:
{
"docker_isolation": {
"enabled": true,
"memory_limit": "512m",
"cpu_limit": "1.0",
"timeout": "60s",
"network_mode": "bridge",
"default_images": {
"python": "python:3.11",
"uvx": "python:3.11",
"node": "node:20",
"npx": "node:20",
"go": "golang:1.21-alpine"
}
},
"mcpServers": [
{
"name": "isolated-python-server",
"command": "uvx",
"args": ["some-python-package"],
"env": {
"API_KEY": "your-api-key"
},
"enabled": true
// Docker isolation applied automatically
},
{
"name": "custom-isolation-server",
"command": "python",
"args": ["-m", "my_server"],
"isolation": {
"enabled": true,
"image": "custom-python:latest",
"working_dir": "/app"
},
"enabled": true
}
]
}| Command | Detected Runtime | Docker Image |
|---|---|---|
uvx |
Python with UV package manager | python:3.11 |
npx |
Node.js with npm | node:20 |
python, python3 |
Python | python:3.11 |
node |
Node.js | node:20 |
go |
Go language | golang:1.21-alpine |
cargo |
Rust | rust:1.75-slim |
- Environment Variables: API keys and secrets are passed securely to containers
- Git Support: Full images include Git for installing packages from repositories
- No Docker-in-Docker: Existing Docker servers are automatically excluded from isolation
- Resource Limits: Prevents runaway processes from consuming system resources
- Network Isolation: Containers run in isolated network environments
# Check which servers are using Docker isolation
mcpproxy serve --log-level=debug --tray=false | grep -i "docker isolation"
# Monitor Docker containers created by MCPProxy
docker ps --format "table {{.Names}}\t{{.Image}}\t{{.Status}}"
# View container logs for a specific server
docker logs <container-id>MCPProxy provides seamless OAuth 2.1 authentication for MCP servers that require user authorization (like Cloudflare AutoRAG, GitHub, etc.):
- RFC 8252 Compliant: Dynamic port allocation for secure callback handling
- PKCE Security: Proof Key for Code Exchange for enhanced security
- Auto Browser Launch: Opens your default browser for authentication
- Dynamic Client Registration: Automatic client registration with OAuth servers
- Token Management: Automatic token refresh and storage
- Add OAuth Server: Configure an OAuth-enabled MCP server in your config
- Auto Authentication: MCPProxy detects when OAuth is required (401 response)
- Browser Opens: Your default browser opens to the OAuth provider's login page
- Dynamic Callback: MCPProxy starts a local callback server on a random port
- Token Exchange: Authorization code is automatically exchanged for access tokens
- Ready to Use: Server becomes available for tool calls immediately
Note: The
"oauth"configuration is optional. MCPProxy will automatically detect when OAuth is required and use sensible defaults in most cases. You only need to specify OAuth settings if you want to customize scopes or have pre-registered client credentials.
{
"mcpServers": [
{
"name": "cloudflare_autorag",
"url": "https://autorag.mcp.cloudflare.com/mcp",
"protocol": "streamable-http",
"enabled": true,
"oauth": {
"scopes": ["mcp.read", "mcp.write"],
"pkce_enabled": true
}
}
]
}OAuth Configuration Options (all optional):
scopes: OAuth scopes to request (default:["mcp.read", "mcp.write"])pkce_enabled: Enable PKCE for security (default:true, recommended)client_id: Pre-registered client ID (optional, uses Dynamic Client Registration if empty)client_secret: Client secret (optional, for confidential clients)
Enable debug logging to see the complete OAuth flow:
mcpproxy serve --log-level=debug --tray=falseCheck logs for OAuth flow details:
tail -f ~/Library/Logs/mcpproxy/main.log | grep -E "(oauth|OAuth)"Solve project context issues by specifying working directories for stdio MCP servers:
{
"mcpServers": [
{
"name": "ast-grep-project-a",
"command": "npx",
"args": ["ast-grep-mcp"],
"working_dir": "/home/user/projects/project-a",
"enabled": true
},
{
"name": "git-work-repo",
"command": "npx",
"args": ["@modelcontextprotocol/server-git"],
"working_dir": "/home/user/work/company-repo",
"enabled": true
}
]
}Benefits:
- Project isolation: File-based servers operate in correct directory context
- Multiple projects: Same MCP server type for different projects
- Context separation: Work and personal project isolation
Tool-based Management:
# Add server with working directory
mcpproxy call tool --tool-name=upstream_servers \
--json_args='{"operation":"add","name":"git-myproject","command":"npx","args_json":"[\"@modelcontextprotocol/server-git\"]","working_dir":"/home/user/projects/myproject","enabled":true}'
# Update existing server working directory
mcpproxy call tool --tool-name=upstream_servers \
--json_args='{"operation":"update","name":"git-myproject","working_dir":"/new/project/path"}'MCPProxy works with HTTP by default for easy setup. HTTPS is optional and primarily useful for production environments or when stricter security is required.
💡 Note: Most users can stick with HTTP (the default) as it works perfectly with all supported clients including Claude Desktop, Cursor, and VS Code.
1. Enable HTTPS (choose one method):
# Method 1: Environment variable
export MCPPROXY_TLS_ENABLED=true
mcpproxy serve
# Method 2: Config file
# Edit ~/.mcpproxy/mcp_config.json and set "tls.enabled": true2. Trust the certificate (one-time setup):
mcpproxy trust-cert3. Use HTTPS URLs:
- MCP endpoint:
https://localhost:8080/mcp - Web UI:
https://localhost:8080/ui/
For Claude Desktop, add this to your claude_desktop_config.json:
HTTP (Default - Recommended):
{
"mcpServers": {
"mcpproxy": {
"command": "npx",
"args": [
"-y",
"mcp-remote",
"http://localhost:8080/mcp"
]
}
}
}HTTPS (With Certificate Trust):
{
"mcpServers": {
"mcpproxy": {
"command": "npx",
"args": [
"-y",
"mcp-remote",
"https://localhost:8080/mcp"
],
"env": {
"NODE_EXTRA_CA_CERTS": "~/.mcpproxy/certs/ca.pem"
}
}
}
}- Automatic generation: Certificates created on first HTTPS startup
- Multi-domain support: Works with
localhost,127.0.0.1,::1 - Trust installation: Use
mcpproxy trust-certto add to system keychain - Certificate location:
~/.mcpproxy/certs/(ca.pem, server.pem, server-key.pem)
Certificate trust issues:
# Re-trust certificate
mcpproxy trust-cert --force
# Check certificate location
ls ~/.mcpproxy/certs/
# Test HTTPS connection
curl -k https://localhost:8080/api/v1/statusClaude Desktop connection issues:
- Ensure
NODE_EXTRA_CA_CERTSpoints to the correct ca.pem file - Restart Claude Desktop after config changes
- Verify HTTPS is enabled:
mcpproxy serve --log-level=debug
- Documentation: Configuration, Features, Usage
- Website: https://mcpproxy.app
- Releases: https://github.com/smart-mcp-proxy/mcpproxy-go/releases
We welcome issues, feature ideas, and PRs! Fork the repo, create a feature branch, and open a pull request. See CONTRIBUTING.md (coming soon) for guidelines.
{
  "listen": "127.0.0.1:8080",   // Localhost-only by default for security
  "data_dir": "~/.mcpproxy",
  "enable_tray": true,

  // Search & tool limits
  "top_k": 5,
  "tools_limit": 15,
  "tool_response_limit": 20000,

  // Optional HTTPS configuration (disabled by default)
  "tls": {
    "enabled": false,          // Set to true to enable HTTPS
    "require_client_cert": false,
    "hsts": true
  },

  "mcpServers": [
    { "name": "local-python", "command": "python", "args": ["-m", "my_server"], "protocol": "stdio", "enabled": true },
    { "name": "remote-http", "url": "http://localhost:3001", "protocol": "http", "enabled": true }
  ]
}